How to Activate Panasonic Cameras for NDI HX — Step-by-Step
Sometimes, a Panasonic PTZ camera has an NDI HX license enabled but cannot be activated through Studio Monitor. In these instances, download and install a utility from Panasonic called EZ IP + and follow the instructions below:
- Download the NDI Tools pack for Windows at ndi.video
- Download the EZ IP+ software from Panasonic from here
- Purchase the Panasonic upgrade from for the camera from here. PLEASE NOTE THE FOLLOWING:
- If you have purchased a license already, you don't need to do so again
- You may have been given a coupon code to redeem, instead of a license. A camera license will start with the letters PN and be a 15- character alphanumeric number such as PNABC123456789 A coupon code will be in the form of CCIP-ABSC-1234
- If you have a serial number, proceed to step 4
- If you have a coupon code, you must purchase a license from the store in step 3, and use the coupon code as a form of payment.
- Use the Panasonic EZ IP+ software to find your camera on the network
- Identify your camera, and press the Activation button on the lower menu, as shown here:
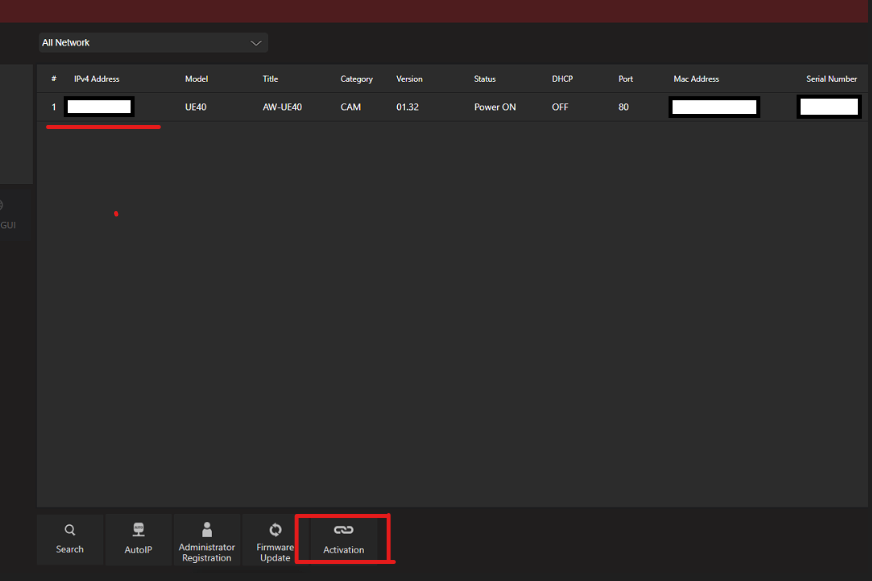
- When prompted, enter your serial number, NOT your coupon code
- Congratulations- your camera is now activated.
Please note: Some cameras may require you to to enable NDI first going into their UI and selecting the Video IP method as NDI. Also, some cameras may require a firmware upgrade first that must be installed prior to these steps.


